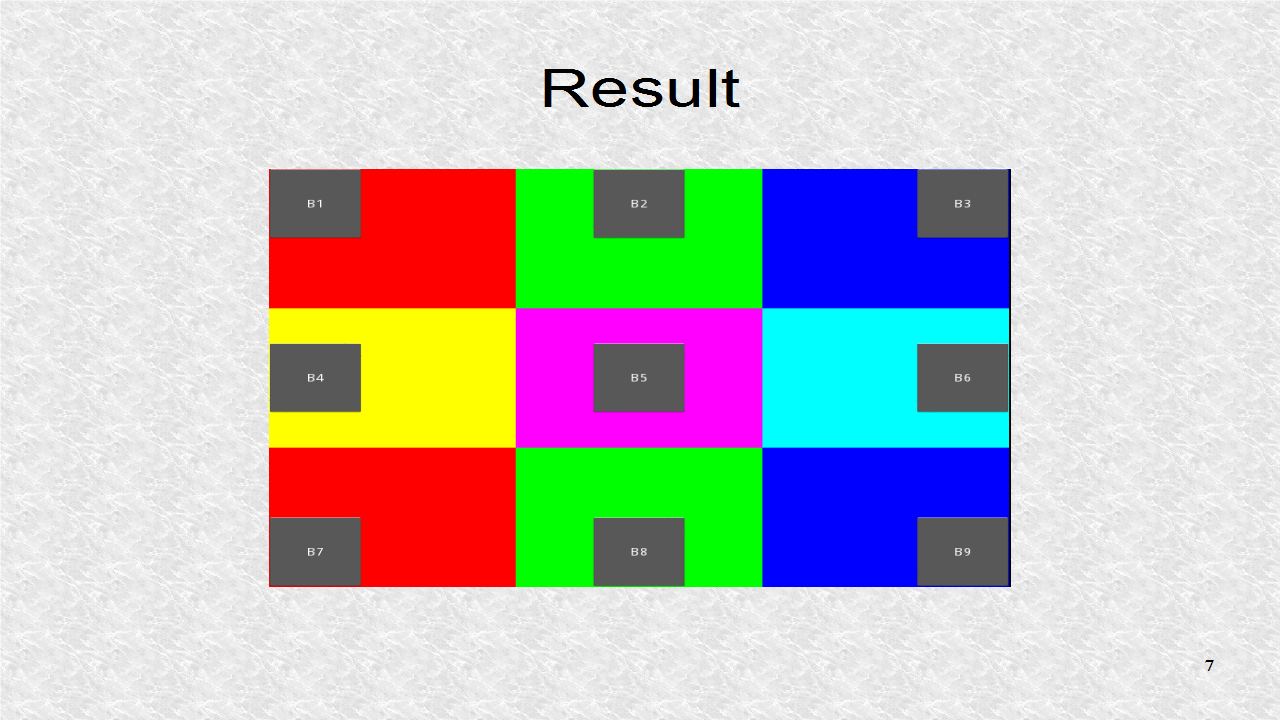
In AnchorLayout, we can anchor a child to 9 different positions. These 9 positions include the 4 corners, the 4 points corresponding to the middle of edge lines, as well as the center the layout.
This is the Python program that will load the AnchorLayouts. Here, we use a GridLayout as our root widget class. The GridLayout, will be the parent of 9 AnchorLayouts. The 9 AnchorLayouts will be anchored at the 9 different anchoring positions.
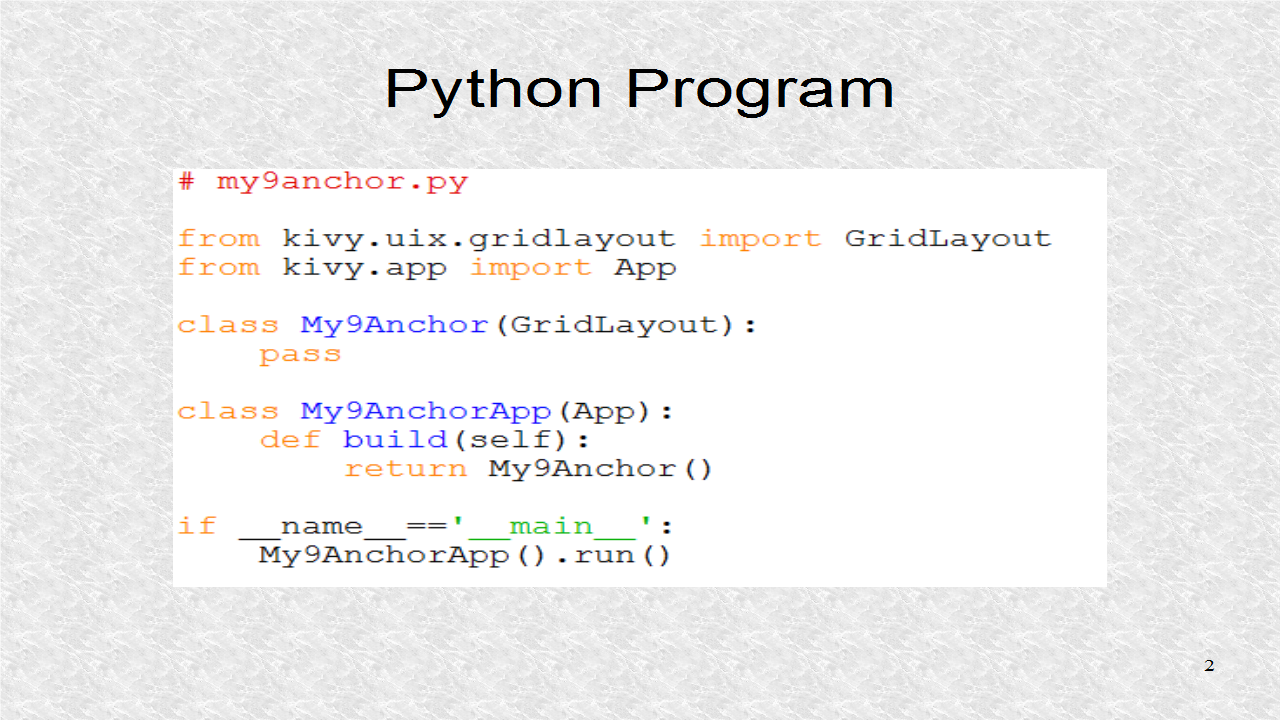
# my9anchor.py

from kivy.uix.gridlayout import GridLayout
from kivy.app import App

class My9Anchor(GridLayout):
    pass

class My9AnchorApp(App):
    def build(self):
        return My9Anchor()

if __name__=='__main__':
    My9AnchorApp().run()
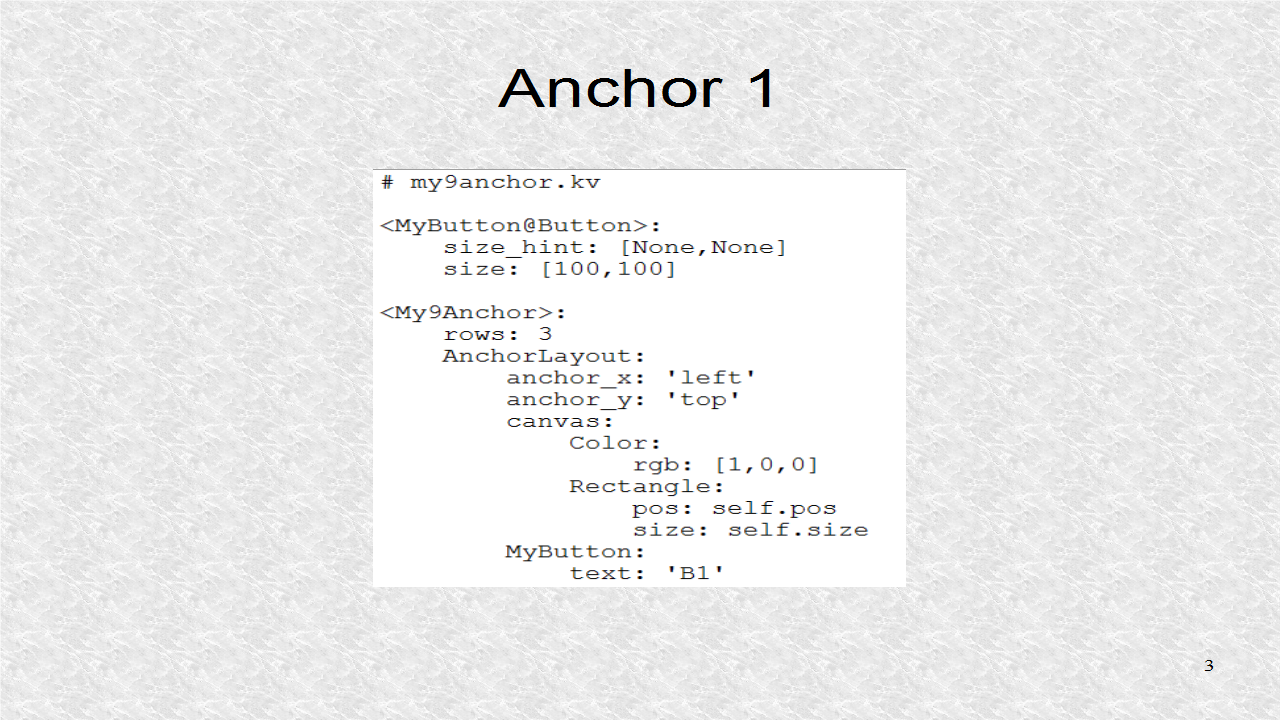
First a class, MyButton, is created. MyButton is based on Button, but is a Button of size 100 by 100. To give a size, the size_hint has to be None for x and y. Then, a grid with rows equal to 3 is created. Since, there are a total of 9 AnchorLayout children, a matrix of 3 by 3 is created. The first AnchorLayout, anchors the button at top-left side. The button has the text 'B1'. The AnchorLayout is colored red.
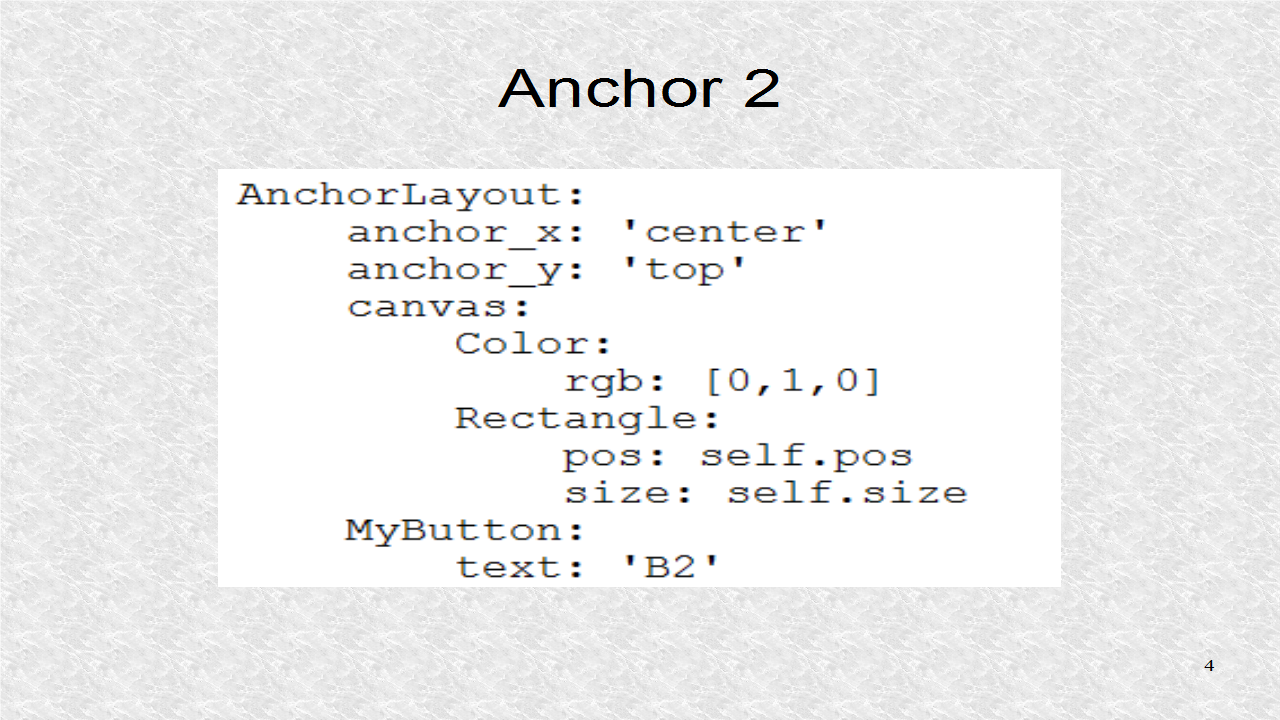
The second AnchorLayout has the buttons anchored at the top-center, with a button text of 'B2'. The layout is of color green.
AnchorLayout 3 has the button anchored at the top-right. It has the text 'B3'. The AnchorLayout is colored blue.
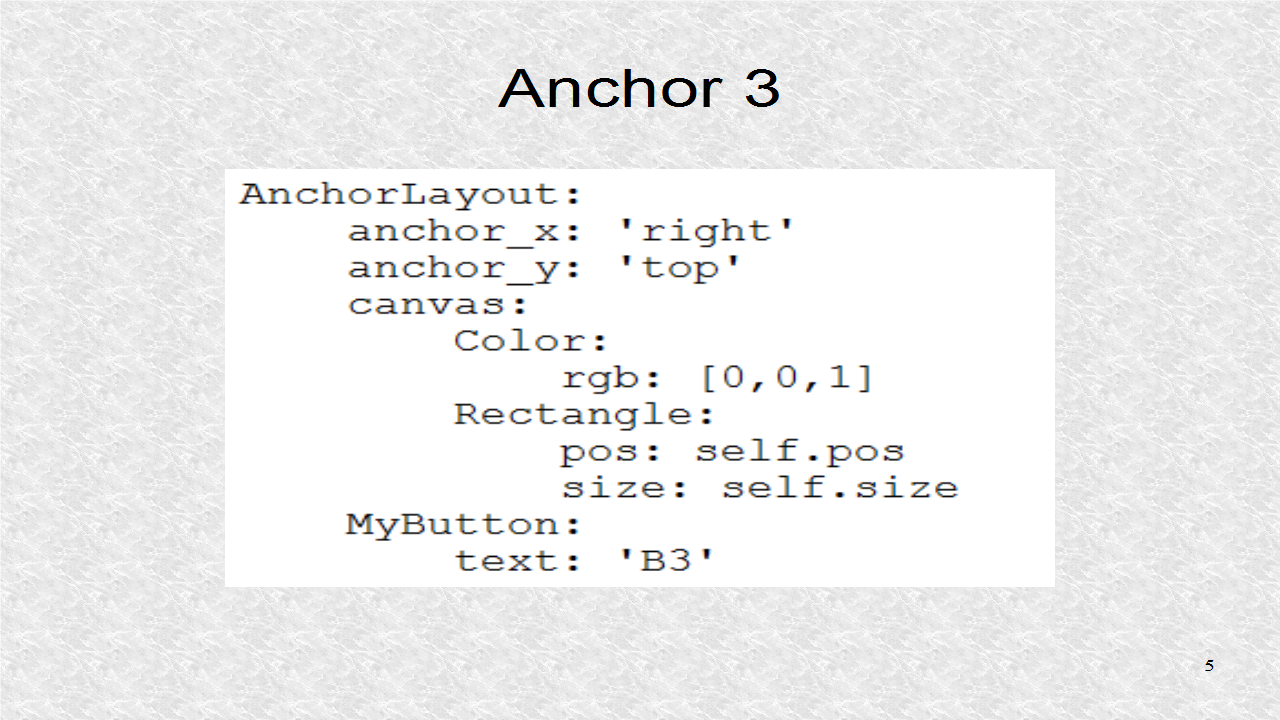
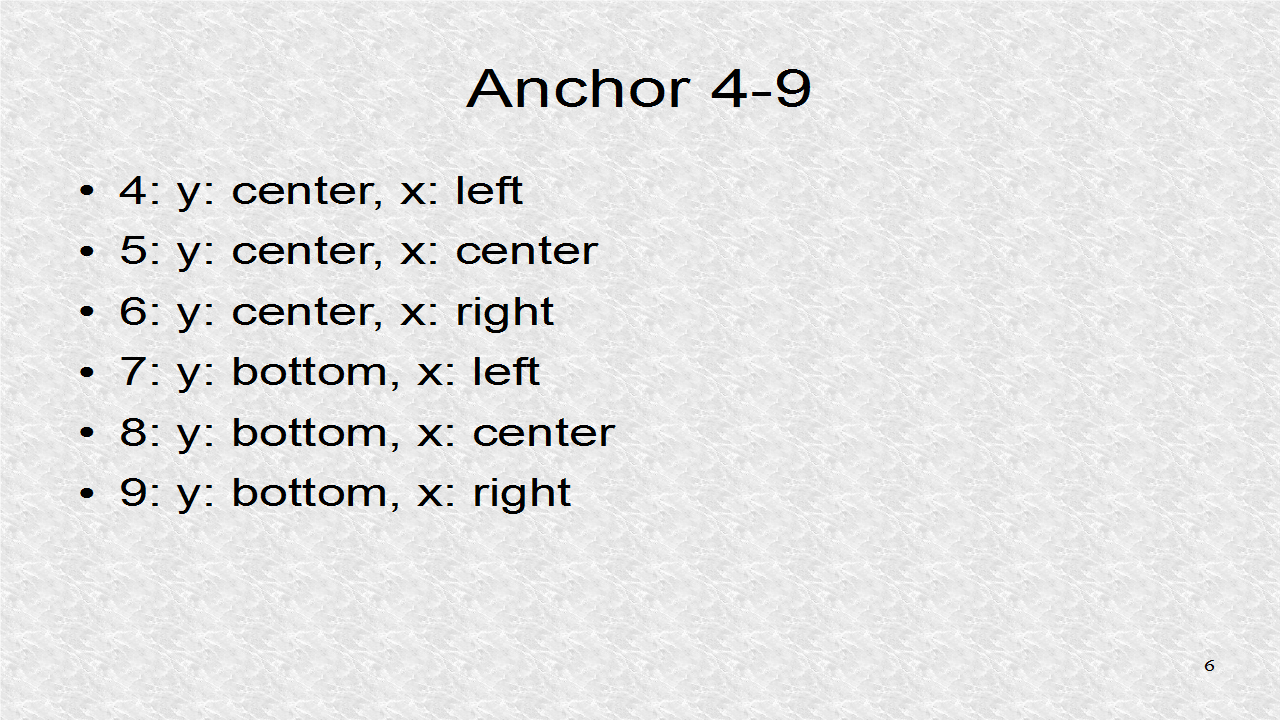
Next the other AnchorLayouts are defined. For AnchorLayout 4, the button is anchored at center-left, that is y is selected as center, and x is selected as left. The others are center-center, center-right, bottom-left, bottom-center, and bottom-right. The colors in the last row are the same as in the first row.
# my9anchor.kv

<MyButton@Button>:
    size_hint: [None,None]
    size: [100,100]

<My9Anchor>:
    rows: 3
    AnchorLayout:
        anchor_x: 'left'
        anchor_y: 'top'
        canvas:
            Color:
                rgb: [1,0,0]
            Rectangle:
                pos: self.pos
                size: self.size
        MyButton:
            text: 'B1'
    AnchorLayout:
        anchor_x: 'center'
        anchor_y: 'top'
        canvas:
            Color:
                rgb: [0,1,0]
            Rectangle:
                pos: self.pos
                size: self.size
        MyButton:
            text: 'B2'
    AnchorLayout:
        anchor_x: 'right'
        anchor_y: 'top'
        canvas:
            Color:
                rgb: [0,0,1]
            Rectangle:
                pos: self.pos
                size: self.size
        MyButton:
            text: 'B3'
    AnchorLayout:
        anchor_x: 'left'
        anchor_y: 'center'
        canvas:
            Color:
                rgb: [1,1,0]
            Rectangle:
                pos: self.pos
                size: self.size
        MyButton:
            text: 'B4'
    AnchorLayout:
        anchor_x: 'center'
        anchor_y: 'center'
        canvas:
            Color:
                rgb: [1,0,1]
            Rectangle:
                pos: self.pos
                size: self.size
        MyButton:
            text: 'B5'
    AnchorLayout:
        anchor_x: 'right'
        anchor_y: 'center'
        canvas:
            Color:
                rgb: [0,1,1]
            Rectangle:
                pos: self.pos
                size: self.size
        MyButton:
            text: 'B6'
    AnchorLayout:
        anchor_x: 'left'
        anchor_y: 'bottom'
        canvas:
            Color:
                rgb: [1,0,0]
            Rectangle:
                pos: self.pos
                size: self.size
        MyButton:
            text: 'B7'
    AnchorLayout:
        anchor_x: 'center'
        anchor_y: 'bottom'
        canvas:
            Color:
                rgb: [0,1,0]
            Rectangle:
                pos: self.pos
                size: self.size
        MyButton:
            text: 'B8'
    AnchorLayout:
        anchor_x: 'right'
        anchor_y: 'bottom'
        canvas:
            Color:
                rgb: [0,0,1]
            Rectangle:
                pos: self.pos
                size: self.size
        MyButton:
            text: 'B9'
This is the result. This was not a very realistic example, since the child does not have to be a widget. It could be another Layout, which could have many widgets. Thus by combination of layouts, we can create a complex widget design. As you can see, the kv file will become large. However, we can split the kv file, as we will see later.
Good Post! Thank you so much for sharing this pretty post, it was so good to read and useful to improve my knowledge as updated one, keep blogging.
ReplyDeletePython Training in electronic city